Happy Sunday everyone! Good news: 1. I've finished my exams 2. I'm having a holiday! Unfortunately, I'm also having a flu and I haven't got the idea of how to spend this holiday. That's the problem with holiday, isn't it? You've got so much time you don't know what to do.
Seriously guys, I've run out of ideas, especially card ideas. My friend told me to make sort of a masculine card, which is hard, and I'm still thinking about it. Also, I've made a list of my holiday activities: have a swimming lesson, ice skating, cycling with friend. And I'm planning to have a project with my auntie, so what's next? I've got a whole 60 days to spend...
30/04/11
23/04/11
20/04/11
Bling bling
Who doesn't love this sparkling, shimmering, shining, twinkling, glistening dust? It can be really messy when you spill it, but still, the effects glitter make is stunning. It can be used in a bunch of ways, to emphasize certain part of a card, also to add interest to simple cards.
Today, I'm going to show you three cards (as usual :) which are very simple and easy to make ( so very easy that it'll only take about 5 minutes to finish). Basically, to make all the cards, you only need a black pen, two coloring markers, glue, and of course, some glitter ( the sentiment stamps are not necessary since you can write the sentiment yourself). So what I did was just drawing simple, sort of whimsical objects and colored them with my marker, and embellish them further with glitter. Easy, right?
18/04/11
Another set of 3
17/04/11
Tools and Supplies and all things nice
Happy Monday, guys! ( Happy Monday?? That's unheard of, well I'm happy cause I'm having a holiday!)
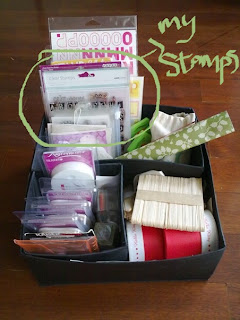
Well, today I'm gonna show you all the things that I use for making cards. I store all my supplies in canvas boxes from IKEA which are very very useful and practical. The set of boxes I bought consists of two large square boxes, two rectangular boxes, and two small square boxes. These boxes make me....uhm...pretty organized, but when I don't feel like cleaning up my mess, I'll just stack my dirty stamps and put them in one of these boxes..lol... ( one can never be too organized right?)
Well, today I'm gonna show you all the things that I use for making cards. I store all my supplies in canvas boxes from IKEA which are very very useful and practical. The set of boxes I bought consists of two large square boxes, two rectangular boxes, and two small square boxes. These boxes make me....uhm...pretty organized, but when I don't feel like cleaning up my mess, I'll just stack my dirty stamps and put them in one of these boxes..lol... ( one can never be too organized right?)
 |
| Double tapes, glitters, glossy accents, foam tapes, circle punch, you name it! |
 |
| Inkpads, most of them are Tsukineko's products |
 |
| Buttons,buttons,buttons... (love them!) |
 |
| Ribbons, in various colors and sizes |
Happy Holiday!
Guess what? I'm having a holiday for a WHOLE week! huahuaahahaha....I'll have some fun blogging and making cards these days. Actually I'll have some pretty important ( I guess it's really important) exams next week. I know that I'm supposed to study, but I've mastered almost all the subjects, so why not have some fun first? lol
Friendship scrapbook
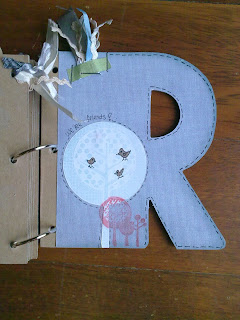
Good morning everyone, today I'm gonna show you all my very first finished scrapbook! Actually, I made it for my friend whose birthday was... uhmm... about nine months ago... Silly eh? Since we'll soon graduate ( and I'll move to another school), I decided to make her something that will remind her of the moments we spent together in junior high school. I have a chipboard scrapbook spelled "FRIENDS" at home and it hasn't been used, and I thought :" Why not?" Isn't it fun to make something we love to make for someone else's birthday?
 |
| So this is how the chipboard scrapbook looked like |
 |
| And these are the pattern paper I used to cover each page |
 |
| This is the finished scrapbook, a bit crowded don't you think? |
Lonely...
I know that I've done this before: using the same supplies ( stamp & card stocks) to make three similar cards. As I said in the 'Love Birds' archive ( January 2011), it develops your creativity when you're trying to make three different cards out of the same supplies.
Well, the idea I got for making these cards is from the two copic markers that I've bought. I found that these two markers are really nice for coloring things and I was sketching a card design when this 'swirling branch' idea crept to my mind. The leaves are perfect for those markers to color in, and then I thought: What kind of card can I make that have branches on it? Then, when I saw those earthy colors, I got the idea to use the bird stamp and make some 'lonely' cards...
If you look more closely, You'll notice that the flower images looked like they were water colored, well that's because I used the 'Baby Blossoms' copic marker to ink the flower stamp, and I love the finished images!


It's just a number
This is probably the freakiest card I've ever made. And I made it for my mum's high school friend, who'll be having a 50th birthday during their reunion in Bali this June. Mum said that he loves to bike, and she told me to make a bigger card that'll fit about 60 signatures . My mum also showed me his profile picture in facebook where he's posing on a bike and I decided to use his photo as a focal point of the card. I think that by using the recipient's photo, it'll make the card more personal. I hope that the recipient will like it as much as I do making it.
Card Sketches
Hi again people, happy Sunday!
Though I normally post ideas about ready made cards, today is an exception, because today I'm going to show you guys my card sketches. If you're the kind of person who plans absolutely everything and you wanna make some cards, I suggested you to sketch the design first. There are many advantages when you sketch, you kind of plan how you want to make it so you can visualize the ready made card better. It also saves time, by looking at your sketch, you can prepare the tools and supplies you need, and you know where you want to put the embellishment. However, you don't have to make a card that looks exactly the same as your sketch, you can always improvise.
So these are a few card sketches that I want to share, enjoy!
16/04/11
Friendship Blossoms
Happy Saturday! As the usual weekend blogging, today I'm gonna show you some card ideas...
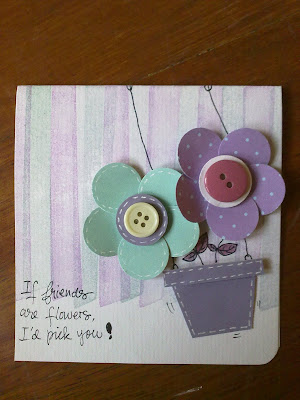
I'm falling in love with flowers all over again, and every cards that I'm showing you in this archive have some flowers on them. Since I'm going to graduate this June, I've been piling up a few friendship cards that I intend to give my friends. And I think that flowers are the perfect embellishments for this kind of cards.
The flowers on each cards are similar, and they're basically made from five punched circles that were glued together, so it was pretty easy to make. Enjoy the cards!


Langganan:
Komentar (Atom)


